Thursday 27 December 2012

Daydream: Interactive Screen Savers

Posted by Daniel Sandler, a software engineer on the Android System UI team
Daydream


I’ve always loved screen savers. Supposedly they exist for a practical purpose: protecting that big, expensive monitor from the ghosts of spreadsheets past.


But I’ve always imagined that your computer is secretly hoping you’ll stand up and walk away for a bit. Just long enough for that idle timer to expire…so it can run off and play for a little while. Draw a picture, set off fireworks, explore the aerodynamics of kitchen appliances, whatever—while always ready to get back to work at a keystroke or nudge of the mouse.


Daydream, new in Android 4.2, brings this kind of laid-back, whimsical experience to Android phones and tablets that would otherwise be sleeping. If you haven’t checked it out, you can turn it on in the Settings app, in Display > Daydream; touch When to Daydream to enable the feature when charging.


An attract mode for apps


Apps that support Daydream can take advantage of the full Android UI toolkit in this mode, which means it’s easy to take existing components of your app — including layouts, animations, 3D, and custom views—and remix them for a more ambient presentation. And since you can use touchscreen input in this mode as well, you can provide a richly interactive experience if you choose.


Daydream provides an opportunity for your app to show off a little bit. You can choose to hide some of your app’s complexity in favor of one or more visually compelling experiences that can entertain from across a room, possibly drawing the user into your full app, like a video game’s attract mode.


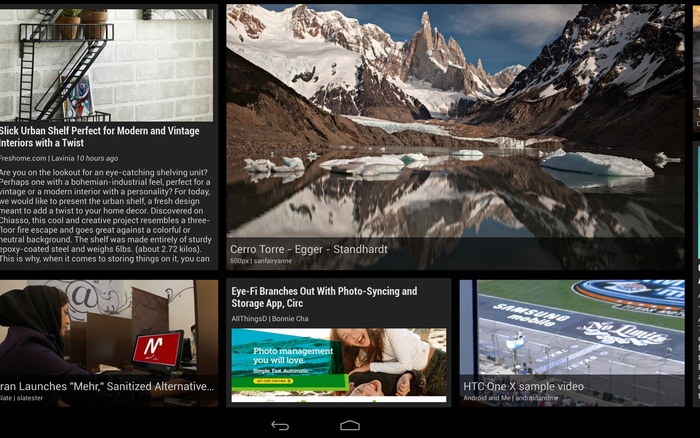
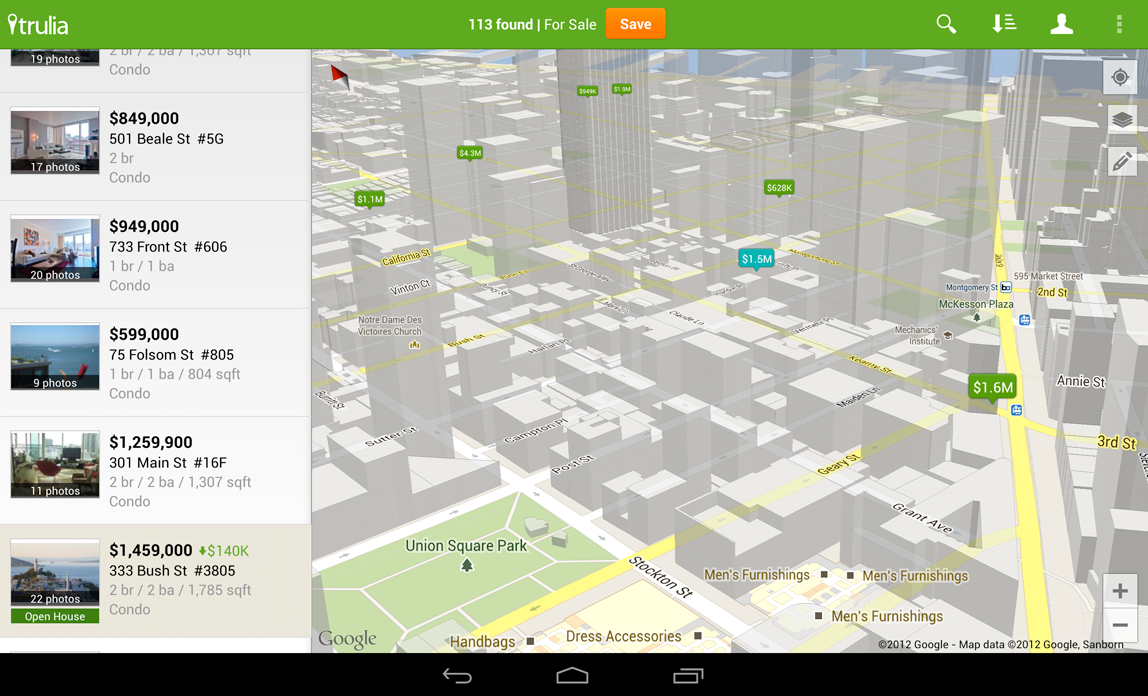
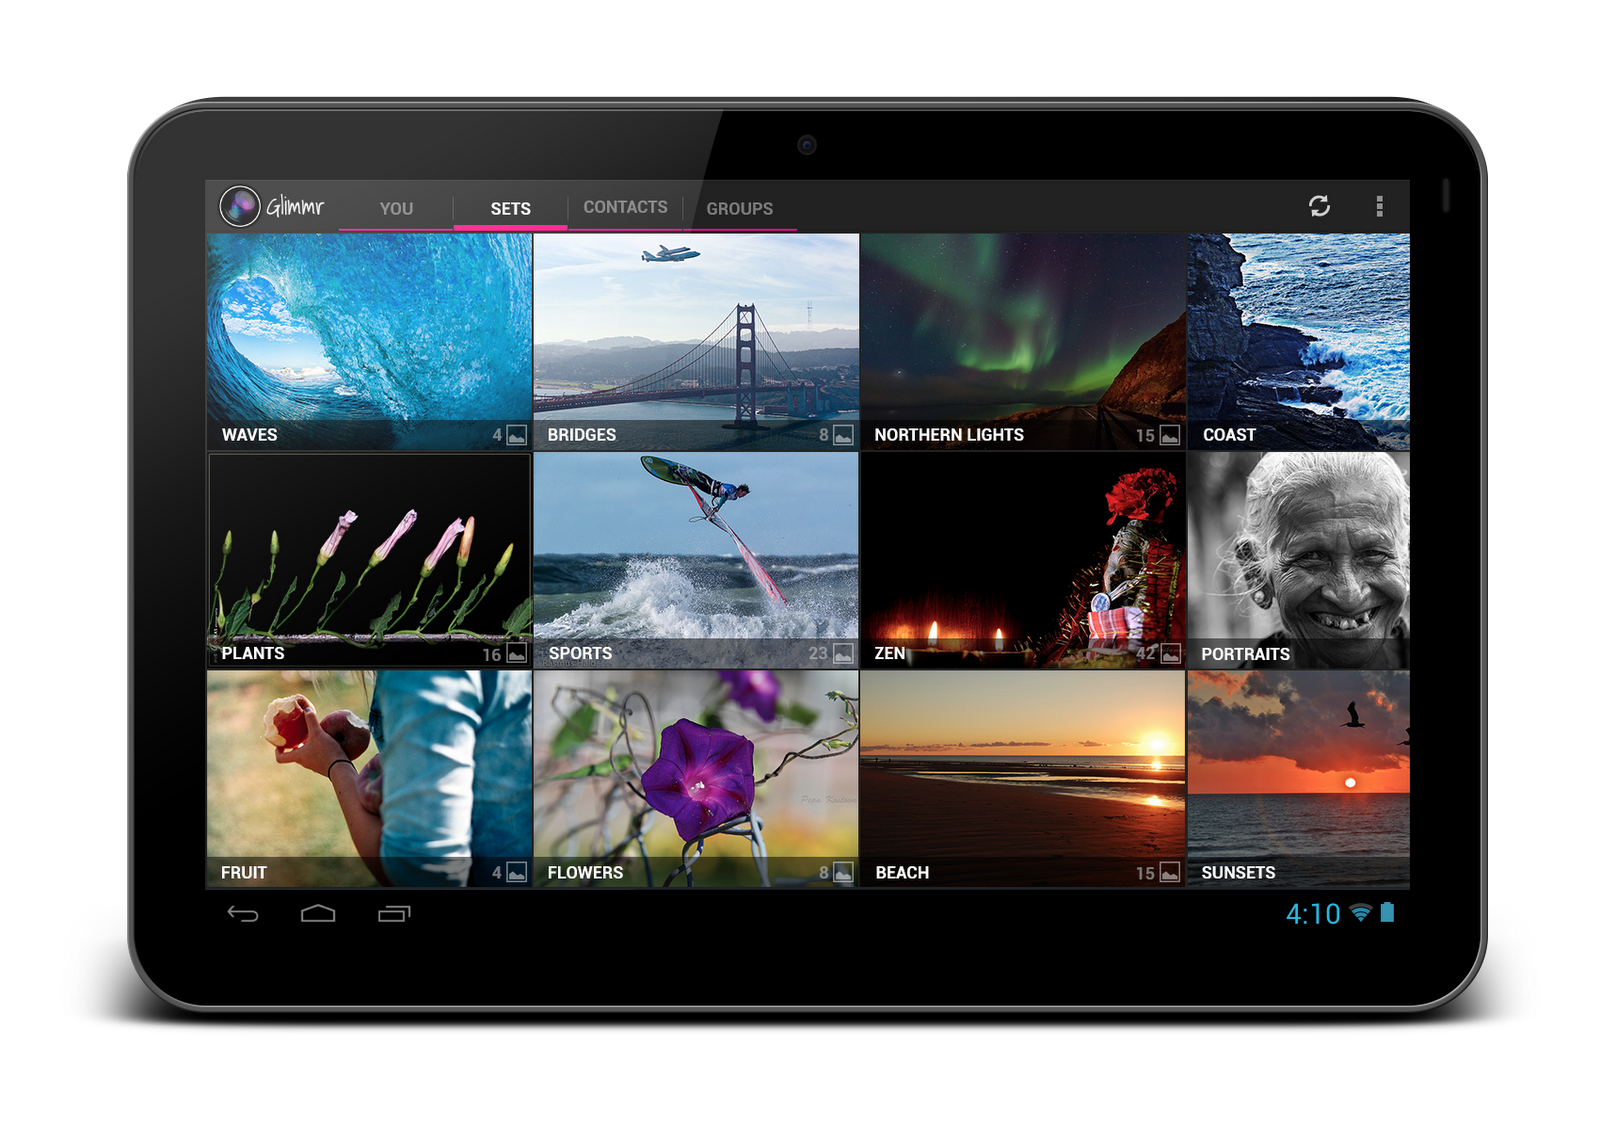
Figure 1. Google Currents scrolls stories past in a smooth, constantly-moving wall of news.


Google Currents is a great example of this approach: as a Daydream, it shows a sliding wall of visually-interesting stories selected from your editions. Touch a story, however, and Currents will show it to you full-screen; touch again to read it in the full Currents app.


The architecture of a Daydream


Each Daydream implementation is a subclass of android.service.dreams.DreamService. When you extend DreamService, you’ll have access to a simple Activity-like lifecycle API.


Key methods on DreamService to override in your subclass (don’t forget to call the superclass implementation):


Important methods on DreamService that you may want to call:


  • setContentView() — set the scene for your Daydream. Can be a layout XML resource ID or an instance of View, even a custom View you implement yourself.

  • setInteractive(boolean) — by default, your Daydream will exit if the user touches the screen, like a classic screen saver. If you want the user to be able to touch and interact with your Views, call setInteractive(true).

  • setFullscreen(boolean) — convenience method for hiding the status bar (see below).

  • setScreenBright(boolean) — by default, Daydreams keep the screen on at full brightness, which may not be appropriate for some situations (for example, dark rooms); setting this to false will reduce the display brightness to a very low level.


Finally, to advertise your Daydream to the system, create a <service> for it in your AndroidManifest.xml:


<?xml version="1.0" encoding="utf-8"?>
<manifest xmlns:android="http://schemas.android.com/apk/res/android"
package="com.example.app">
<uses-sdk android:targetSdkVersion="17" android:minSdkVersion="17" />

<application>
<service
android:name=".ExampleDaydream"
android:exported="true"
android:label="@string/my_daydream_name">
<intent-filter>
<action android:name="android.service.dreams.DreamService" />
<category android:name="android.intent.category.DEFAULT" />
</intent-filter>
<meta-data
android:name="android.service.dream"
android:resource="@xml/dream_info" />
</service>
</application>
</manifest>


The <meta-data> tag is optional; it allows you to point to an XML resource that specifies a settings Activity specific to your Daydream. The user can reach it by tapping the settings icon next to your Daydream’s name in the Settings app.


<!-- res/xml/dream_info.xml -->
<?xml version="1.0" encoding="utf-8"?>
<dream xmlns:android="http://schemas.android.com/apk/res/android"
android:settingsActivity="com.example.app/.ExampleDreamSettingsActivity" />


Here's an example to get you going: a classic screen saver, the bouncing logo, implemented using a TimeAnimator to give you buttery-smooth 60Hz animation.


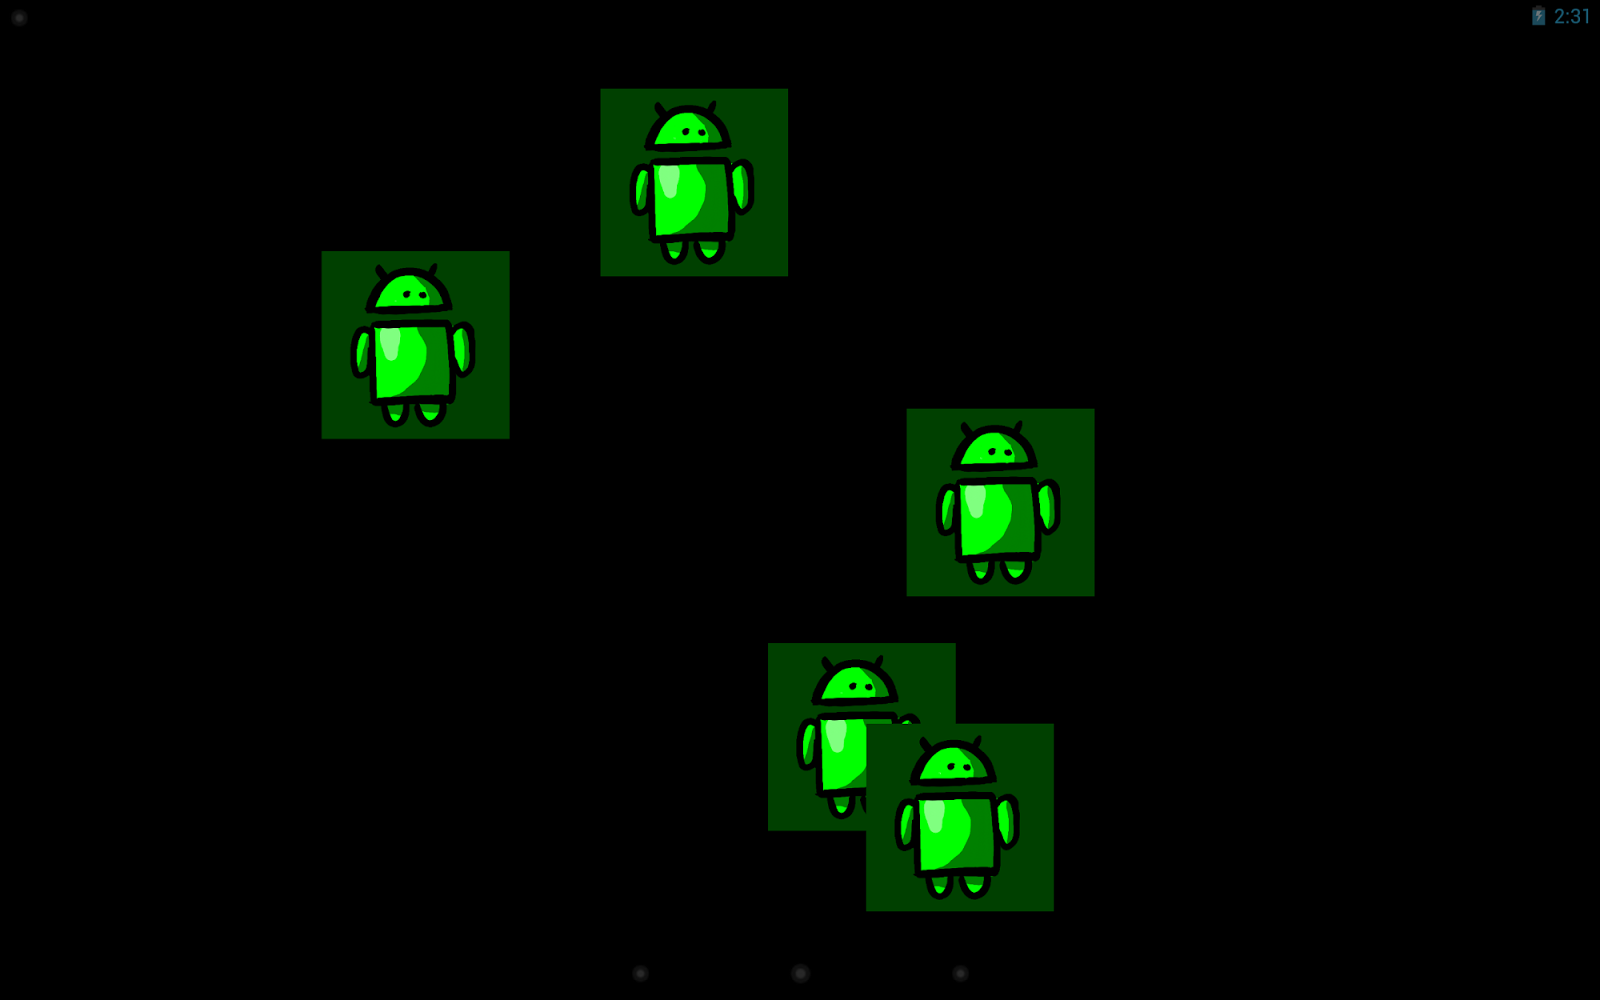
Figure 2. Will one of them hit the corner?


public class BouncerDaydream extends DreamService {
@Override
public void onDreamingStarted() {
super.onDreamingStarted();

// Our content view will take care of animating its children.
final Bouncer bouncer = new Bouncer(this);
bouncer.setLayoutParams(new
ViewGroup.LayoutParams(MATCH_PARENT, MATCH_PARENT));
bouncer.setSpeed(200); // pixels/sec

// Add some views that will be bounced around.
// Here I'm using ImageViews but they could be any kind of
// View or ViewGroup, constructed in Java or inflated from
// resources.
for (int i=0; i<5; i++) {
final FrameLayout.LayoutParams lp
= new FrameLayout.LayoutParams(WRAP_CONTENT, WRAP_CONTENT);
final ImageView image = new ImageView(this);
image.setImageResource(R.drawable.android);
image.setBackgroundColor(0xFF004000);
bouncer.addView(image, lp);
}

setContentView(bouncer);
}
}

public class Bouncer extends FrameLayout implements TimeAnimator.TimeListener {
private float mMaxSpeed;
private final TimeAnimator mAnimator;
private int mWidth, mHeight;

public Bouncer(Context context) {
this(context, null);
}

public Bouncer(Context context, AttributeSet attrs) {
this(context, attrs, 0);
}

public Bouncer(Context context, AttributeSet attrs, int flags) {
super(context, attrs, flags);
mAnimator = new TimeAnimator();
mAnimator.setTimeListener(this);
}

/**
* Start the bouncing as soon as we’re on screen.
*/
@Override
public void onAttachedToWindow() {
super.onAttachedToWindow();
mAnimator.start();
}

/**
* Stop animations when the view hierarchy is torn down.
*/
@Override
public void onDetachedFromWindow() {
mAnimator.cancel();
super.onDetachedFromWindow();
}

/**
* Whenever a view is added, place it randomly.
*/
@Override
public void addView(View v, ViewGroup.LayoutParams lp) {
super.addView(v, lp);
setupView(v);
}

/**
* Reposition all children when the container size changes.
*/
@Override
protected void onSizeChanged (int w, int h, int oldw, int oldh) {
super.onSizeChanged(w, h, oldw, oldh);
mWidth = w;
mHeight = h;
for (int i=0; i<getChildCount(); i++) {
setupView(getChildAt(i));
}
}

/**
* Bouncing view setup: random placement, random velocity.
*/
private void setupView(View v) {
final PointF p = new PointF();
final float a = (float) (Math.random()*360);
p.x = mMaxSpeed * (float)(Math.cos(a));
p.y = mMaxSpeed * (float)(Math.sin(a));
v.setTag(p);
v.setX((float) (Math.random() * (mWidth - v.getWidth())));
v.setY((float) (Math.random() * (mHeight - v.getHeight())));
}

/**
* Every TimeAnimator frame, nudge each bouncing view along.
*/
public void onTimeUpdate(TimeAnimator animation, long elapsed, long dt_ms) {
final float dt = dt_ms / 1000f; // seconds
for (int i=0; i<getChildCount(); i++) {
final View view = getChildAt(i);
final PointF v = (PointF) view.getTag();

// step view for velocity * time
view.setX(view.getX() + v.x * dt);
view.setY(view.getY() + v.y * dt);

// handle reflections
final float l = view.getX();
final float t = view.getY();
final float r = l + view.getWidth();
final float b = t + view.getHeight();
boolean flipX = false, flipY = false;
if (r > mWidth) {
view.setX(view.getX() - 2 * (r - mWidth));
flipX = true;
} else if (l < 0) {
view.setX(-l);
flipX = true;
}
if (b > mHeight) {
view.setY(view.getY() - 2 * (b - mHeight));
flipY = true;
} else if (t < 0) {
view.setY(-t);
flipY = true;
}
if (flipX) v.x *= -1;
if (flipY) v.y *= -1;
}
}

public void setSpeed(float s) {
mMaxSpeed = s;
}
}


This example code is handy for anything you want to show the user without burning it into the display (like a simple graphic or an error message), and it also makes a great starting point for more complex Daydream projects.


A few more idle thoughts


  • First, do no harm: Daydream is meant to run when a device is charging. However, if the Daydream consumes too much CPU, charging might happen very slowly or not at all! The system will stop your Daydream if it detects that the device is not charging, so make sure your code leaves enough power to charge the battery in a reasonable amount of time.

  • Respect the lockscreen: Daydream runs on top of the secure keyguard, which means that if you might be showing sensitive content, you need to give the user tools to control that content. For example, Photo Table and Photo Frame allow the user to select the albums from which photos will be displayed (avoiding embarrassing slideshows).

  • Screen brightness: Think about where you expect your Daydream to be used and adjust the screen brightness accordingly using setScreenBright() and possibly even using darker or brighter colors as necessary. A bedside clock will need to be dimmer than a desk clock; if you expect your Daydream to serve both purposes you'll need to give the user a choice.

  • To hide the status bar or not: Many users will need instant access to the battery level and time of day, so you should avoid using setFullscreen(), particularly if your Daydream is more informational than artistic. Daydream will start with the status bar in “lights out” mode (View.SYSTEM_UI_FLAG_LOW_PROFILE), where it’s quite unobtrusive but still shows the clock and charge status.

  • When to use settings: In general, you have a little latitude for adding extra knobs and dials to Daydream settings. After all, this is a personalization feature, so users should be encouraged to tweak things until they feel at home. Sometimes, though, a more compelling experience can come from taking an artistic stand: giving the user a choice from a small number of polished, beautiful configurations (rather than providing all the controls of a commercial airline cockpit).

  • There can be more than one: If you discover that your settings allow the user to pick between a few radically different display modes, consider splitting your Daydream into multiple DreamService implementations. For example, the photo gallery in Android 4.2 provides both the Photo Table and Photo Frame Daydreams.

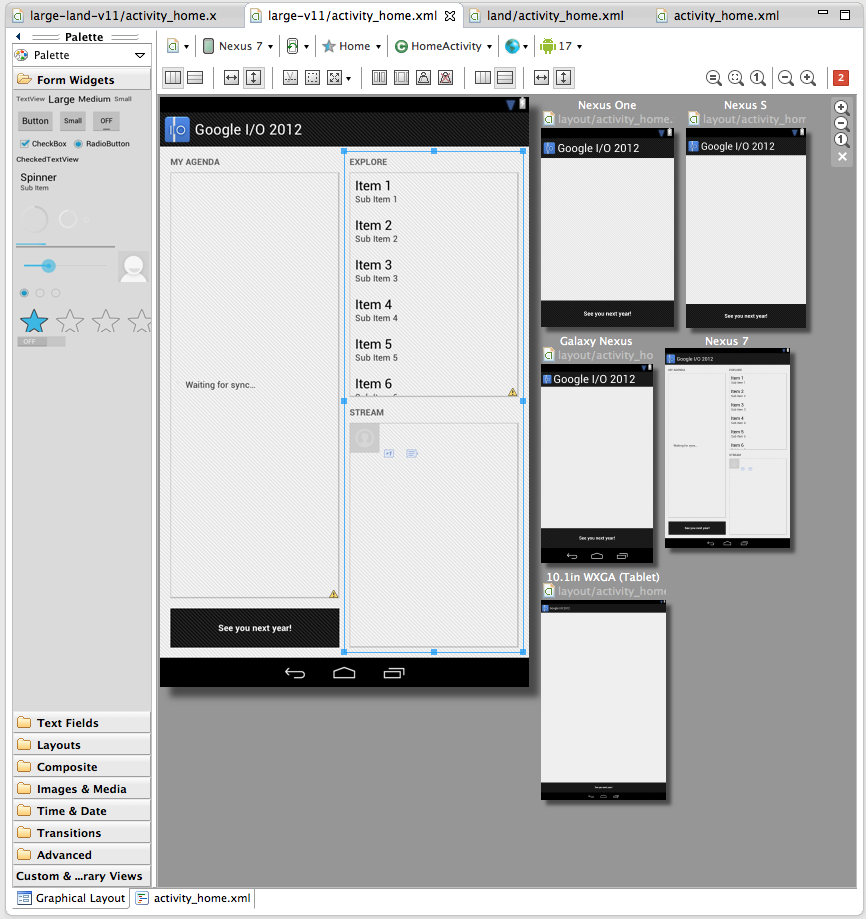
  • Use an Activity for development: Most Android development tools are optimized for developing and debugging conventional Android apps; since DreamService and Activity are so similar, it can be useful to create a testing Activity that hosts the same content view as your DreamService. This way you can launch and test your code easily from your IDE as if it were any other Android project.


OK, that’s enough for now; you have the tools to go build Daydream support into your apps. Have fun with it — if you do, your users will have fun too. Oh, and when you upload your shiny new APK to Google Play, be sure to add a note to your app’s description so that users searching for Daydreams can discover it.


Further reading and samples


  • API docs for DreamService

  • Sample code: BouncerDaydream, complete project for the code snippets in this post

  • Sample code: WebView, a Daydream that shows an HTML page

  • Sample code: Colors, a Daydream that demonstrates OpenGL ES 2.0 and TextureView


Thursday 20 December 2012

Localize Your Promotional Graphics on Google Play

Posted by Ellie Powers, Product Manager on the Google Play team


Google Play is your way to reach millions and millions of Android users around the world. In fact, since the start of 2011, the number of countries where you can sell apps has increased from 30 to over 130 — including most recently, the launch of paid app support in Israel, Mexico, the Czech Republic, Poland, Brazil and Russia, and fully two-thirds of revenue for apps on Google Play comes from outside of the United States.


To help you capitalize on this growing international audience, it’s now even easier to market your apps to users around the world, by adding images and a video URL to your Google Play store listing for each of Google Play’s 49 languages, just as you’ve been able to add localized text.


A localized feature graphic can show translated text or add local flavor to your app — for example, changing its theme to reflect local holidays. Always make sure that your feature graphic works at different sizes.


Once you’ve localized your app, you’ll want to make sure users in all languages can understand what your app does and how it can benefit them. Review the graphics guidelines and get started with localized graphics.


Localized screenshots make it clear to the user that they’ll be able to use your app in their language. As you’re adding localized screenshots, remember that a lot of people will be getting new tablets for the holidays, and loading up with new apps, so you’ll want to include localized tablet screenshots to show off your tablet layouts.


With localized videos, you can now include a language-appropriate voiceover and text, and of course show the app running in the user’s language.


Ready to add localized images and videos to your store listing? To add localized graphics and video to your apps, you need to use the Google Play Developer Console preview — once you add localized graphics, you won’t be able to edit the app using the old version anymore. Those of you who use APK Expansion Files will now want to try the new Developer Console because it now includes this feature. We’ll be adding support for Multiple APK very soon. Once you’ve saved your application in the new Developer Console, automated translations become available to users on the web and devices — with no work from you.


What are you doing to help your app reach a global audience?


Tuesday 11 December 2012

The 2012 Android Developer Survey


The Android Developer Relations team is passionate about making Android app development a great experience, so we're asking all of you involved in building Android apps -- from engineers, to product managers, and distribution and support folks -- to let us know what you think.


We want to better understand the challenges you face when planning, designing, writing, and distributing your Android apps, so we've put together a brief (10-15min) survey that will help us test our assumptions and allow us to create better tools and resources for you.


We've had a great response from thousands of Android developers who have already responded - thank you! If you haven't yet filled in the survey, you can find it here: 2012 Android Developer Survey.


We'll be closing this year's survey this Sunday (December 17th) at 12pm Pacific Time, so be sure to get your responses in before then.


To keep the survey short and simple, there are no sections for general comments. That's because we want to hear your thoughts, questions, suggestions, and complaints all year. If there's anything you'd like to share with us, you can let us know by posting to us (publicly or privately) on Google+ at +Android Developers or using the hash tag #AndroidDev.


We can't always respond, but we're paying close attention to everything you have to say.


As always, we're looking forward to hearing your thoughts!

Monday 10 December 2012

In-App Billing Version 3

Posted by Bruno Oliveira of the Android Developer Relations Team


In-app Billing has come a long way since it was first announced on Google Play (then Android Market). One year and a half later, the vast majority of top-grossing apps on Google Play use In-app Billing and thousands of developers monetize apps through try-and-buy, virtual goods, as well as subscriptions.


In-app Billing is expanding again, making it even more powerful and flexible so you can continue to build successful applications. Version 3 introduces the following new features:

  • An improved design that makes applications simpler to write, debug and maintain. Integrations that previously required several hundred lines of code can now be implemented in as few as 50.

  • More robust architecture resulting in fewer lost transactions.

  • Local caching for faster API calls.

  • Long-anticipated functionality such as the ability to consume managed purchases and query for product information.

In-app Billing version 3 is available now and lets you sell both in-app items and (since February 2013) subscriptions, including subscriptions with free trials. It is supported by Android 2.2+ devices running the latest version of the Google Play Store (over 90% of active devices).

Instead of the four different application components required by the asynchronous structure of the previous release, the new version of the API allows developers to make synchronous requests and handle responses directly from within a single Activity, all of which are accomplished with just a few lines of code. The reduced implementation cost makes this a great opportunity for developers who are implementing new in-app billing solutions.


Easier to Implement


In contrast to the earlier model of asynchronous notification through a background service, the new API is now synchronous and reports the result of a purchase immediately to the application. This eliminates the necessity to integrate the handling of asynchronous purchase results into the application's lifecycle, which significantly simplifies the code that a developer must write in order to sell an in-app item.


To launch a purchase, simply obtain a buy Intent from the API and start it:


Bundle bundle = mService.getBuyIntent(3, "com.example.myapp",
MY_SKU, ITEM_TYPE_INAPP, developerPayload);

PendingIntent pendingIntent = bundle.getParcelable(RESPONSE_BUY_INTENT);
if (bundle.getInt(RESPONSE_CODE) == BILLING_RESPONSE_RESULT_OK) {
// Start purchase flow (this brings up the Google Play UI).
// Result will be delivered through onActivityResult().
startIntentSenderForResult(pendingIntent, RC_BUY, new Intent(),
Integer.valueOf(0), Integer.valueOf(0), Integer.valueOf(0));
}


Then, handle the purchase result that's delivered to your Activity's onActivityResult() method:


public void onActivityResult(int requestCode, int resultCode, Intent data) {
if (requestCode == RC_BUY) {
int responseCode = data.getIntExtra(RESPONSE_CODE);
String purchaseData = data.getStringExtra(RESPONSE_INAPP_PURCHASE_DATA);
String signature = data.getStringExtra(RESPONSE_INAPP_SIGNATURE);

// handle purchase here (for a permanent item like a premium upgrade,
// this means dispensing the benefits of the upgrade; for a consumable
// item like "X gold coins", typically the application would initiate
// consumption of the purchase here)
}
}


Also, differently from the previous version, all purchases are now managed by Google Play, which means the ownership of a given item can be queried at any time. To implement the same mechanics as unmanaged items, applications can consume the item immediately upon purchase and provision the benefits of the item upon successful consumption.


Local Caching


The API leverages a new feature of the Google Play store application which caches In-app Billing information locally on the device, making it readily available to applications. With this feature, many API calls will be serviced through cache lookups instead of a network connection to Google Play, which significantly speeds up the API's response time. For example, an application could query the owned items using this call:


Bundle bundle = mService.getPurchases(3, mContext.getPackageName(), ITEM_TYPE_INAPP);
if (bundle.getInt(RESPONSE_CODE) == BILLING_RESPONSE_RESULT_OK) {
ArrayList mySkus, myPurchases, mySignatures;
mySkus = bundle.getStringArrayList(RESPONSE_INAPP_ITEM_LIST);
myPurchases = bundle.getStringArrayList(RESPONSE_INAPP_PURCHASE_DATA_LIST);
mySignatures = bundle.getStringArrayList(RESPONSE_INAPP_PURCHASE_SIGNATURE_LIST);

// handle items here
}


Querying for owned items was an expensive server call in previous versions of the API, so developers were discouraged from doing so frequently. However, since the new version implements local caching, applications can now make this query every time they start running, and as often as necessary thereafter.


Product Information


The API also introduces a long-anticipated feature: the ability to query in-app product information directly from Google Play. Developers can now programmatically obtain an item's title, description and price. No currency conversion or formatting is necessary: prices are reported in the user's currency and formatted according to their locale:


Bundle bundle = mService.getSkuDetails(3, "com.example.myapp", 
ITEM_TYPE_INAPP, skus); // skus is a Bundle with the list of SKUs to query
if (bundle.getInt(RESPONSE_CODE) == BILLING_RESPONSE_RESULT_OK) {
List detailsList = bundle.getStringArrayList(RESPONSE_SKU_DETAILS_LIST);
for (String details : detailsList) {
// details is a JSON string with
// SKU details (title, description, price, ...)
}
}


This means that, for example, developers can update prices in Developer Console and then use this API call to show the updated prices in the application (such as for a special promotion or sale) with no need to update the application's code to change the prices displayed to the user.


Sample Application


In addition to the API, we are releasing a new sample application that illustrates how to implement In-app Billing. It also contains helper classes that implement commonly-written boilerplate code such as marshalling and unmarshalling data structures from JSON strings and Bundles, signature verification, as well as utilities that automatically manage background work in order to allow developers to call the API directly from the UI thread of their application. We highly recommend that developers who are new to In-app Billing leverage the code in this sample, as it further simplifies the process of implemention. The sample application is available for download through the Android SDK Manager.


App-Specific Keys


Along with the other changes introduced with In-app Billing Version 3, we have also improved the way Licensing and In-app Billing keys are managed. Keys are now set on a per-app basis, instead of a per-developer basis and are available on the “Services & APIs” page for each application on Google Play Developer Console preview. Your existing applications will continue to work with their current keys.


Get Started!


To implement In-app Billing in your application using the new API, start with the updated In-App Billing documentation and take the Selling In-App Products training class.

Monday 3 December 2012

New Google Maps Android API now part of Google Play services

Posted by Reto Meier, Evan Rapoport, and Andrew Foster


Google Play services is our new platform that offers you better integration with Google products, and which provides greater agility for quickly rolling out new capabilities for you to use within your apps. Today we’re launching Google Play services v2.0, which includes two new APIs, including perhaps our most frequently requested upgrade: Maps.


Google Maps Android API


The new version of the API allows developers to bring many of the recent features of Google Maps for Android to your Android apps. We’re excited to make this API available as part of Google Play services supporting devices from Froyo onwards (API level 8+).


The new API uses vector-based maps that support 2D and 3D views, and allow users to tilt and rotate the map with simple gestures. Along with the layers you’ve come to know from Google Maps such as satellite, hybrid, terrain and traffic, the new API lets you include indoor maps for many major airports and shopping centers in your app.


One of most common feature requests we’ve heard on Android is support for Map Fragments. With this new API, adding a map to your Activity is as simple as:


<fragment
android:id="@+id/map"
android:layout_width="match_parent"
android:layout_height="match_parent"
class="com.google.android.gms.maps.MapFragment" />


Check out this image from updated Trulia Android app (which goes live tomorrow), that users can use to search for a place to buy or rent in 3D.


The new API is simpler to use, so that creating markers and info windows is easy. Polylines, Polygons, Ground Overlays and Tile Overlays can all now be added to the map with just a few lines of code.


To get started follow the getting started instructions to obtain an API Key. Then download and configure the Google Play services SDK using the SDK Manager. Check the Google Maps for Android API documentation for more details. If you haven't got it already, you'll need to download the Android SDK first.


More than 800,000 sites around the world already use our mapping APIs to create amazing and useful apps. We hope you enjoy using this new addition to the Google Maps API family, and building mapping experiences that were never before possible on a mobile device.


Photo Sphere


In Android 4.2, we introduced Photo Sphere mode in the Camera, which you can use to create amazing, immersive panoramas just like you see in Street View on Google Maps. Today we’re excited to announce new APIs and documentation that empower developers, businesses, and photographers to explore new uses of Photo Sphere for work and for play.


We’ve made Photo Sphere an open format so anyone can create and view them on the web or on mobile devices.


A Photo sphere is simply an image file (like a JPG) that has in it text-based metadata, an open format created by Adobe called XMP. The metadata describes the Photo Sphere’s dimensions and how it should be rendered within the interactive Photo Sphere viewer you see in Android, Google+, and Google Maps.


If you’d like to programmatically or manually add the XMP metadata into panoramic images not created by the Photo Sphere camera in Android, stay tuned today for more details on the metadata and how to apply it to your photos programmatically later.


In the new Google Play services, we’ve added APIs to give you the ability to check whether an image is a Photo Sphere and then open it up in the Photo Sphere viewer.


// This listener will be called with information about the given panorama.
OnPanoramaInfoLoadedListener infoLoadedListener =
new OnPanoramaInfoLoadedListener() {
@Override
public void onPanoramaInfoLoaded(ConnectionResult result,
Intent viewerIntent) {
if (result.isSuccess()) {
// If the intent is not null, the image can be shown as a
// panorama.
if (viewerIntent != null) {
// Use the given intent to start the panorama viewer.
startActivity(viewerIntent);
}
}

// If viewerIntent is null, the image is not a viewable panorama.
}
};

// Create client instance and connect to it.
PanoramaClient client = ...
...

// Once connected to the client, initiate the asynchronous check on whether
// the image is a viewable panorama.
client.loadPanoramaInfo(infoLoadedListener, panoramaUri);

To learn more about Google Play services and the APIs available to you through it, visit the new Google Services area of the Android Developers site.

Monday 26 November 2012

Designing for Tablets? We’re Here to Help!

Posted by Roman Nurik, who often writes about Android design-related topics on Google+

So you’ve got a great Android phone app on Google Play, your users love it, and you’re kicking back and watching the download numbers soar. Congrats! But like any enterprising developer, you may be thinking, “how do I take my app’s success even further?” The answer: an equally awesome experience on tablets. Users love their tablet apps! For example, Mint.com found that the larger screen real estate allowed tablet users to engage with their budget data 7x more than on phones. And TinyCo found that on average, paying users spent 35% more on tablets than on handsets. So now is the right time to think about how your app translates onto these larger screen devices that are designed to meet users’ more generic, everyday computing needs.

In this post, we’ll recap some of the resources available for crafting a great tablet experience for your users. These resources are useful for everyone in the app development pipeline—from product managers, to designers, to developers, and QA engineers.

Android Design Guidelines

No conversation about Android app design or development should go very far without first consulting the Android Design guidelines. While most of the sections are relevant to all Android devices, certain sections stand out as particularly relevant to design on tablets.

The Devices and Displays page introduces the concept of density-independence. For example, although the Nexus 4, Nexus 7, and Motorola XOOM all have a similar pixel resolution (1280x768, 1280x800, and 1280x800 respectively), they have vastly different screens. Instead of thinking in pixels, think in dips (density-independent pixels)—that way, it’s much easier to conceptualize the difference between Nexus 4 (640x384 dp), Nexus 7 (960x600dp), and Nexus 10 or the Motorola XOOM (1280x800 dp).

Following the 48dp rhythm discussed in Metrics and Grids helps take some of the guesswork out of sizing elements, especially for tablets. When in doubt, use multiples of 48dp (or 16dp for a finer grid) for sizing elements horizontally and vertically. For example, when showing sparse content on larger screens, consider using generous side margins of 96dp or 144dp. Or when deciding how wide your master pane should be in a master/detail layout for 10” tablets, see how your master content looks and feels with a width of 240dp or 288dp.

The Multi-pane Layouts guide discusses use cases and examples for combining related views into a single screen to simultaneously improve app navigation and make optimal use of the available screen real estate. It also discusses strategies for laying out content across both portrait and landscape, all while maintaining functional parity across orientations. Since users enjoy using tablets in both portrait and landscape orientations, it’s even more important to react properly to orientation changes than with phones.

Lastly, the Downloadable Stencils offer designers a great starting point for high-fidelity mockups, complete with reference device outlines, correctly sized action bars, and more.

Android Training for Developers

The Training section of the developer site offers task-oriented technical training material, complete with flow diagrams, code snippets, sample projects and more. Several of these ‘classes’ are geared toward helping developers understand how to scale your apps across any screen size.

The Designing Effective Navigation class—aimed more at the initial design phase of the app creation process—offers a methodology for effectively planning and grouping screens on tablets, and even shows example wireframes for a simple news reader application following this methodology.

The classes Building a Dynamic UI with Fragments and Designing for Multiple Screens demonstrate how to use fragments in conjunction with Android’s resources framework. They show how to easily choose between tablet and handset layouts at runtime while maximizing code reuse and minimizing your application size using resource aliases. They also demonstrate techniques for adapting UI flows based on the current layout.

Lastly, while not precisely a training class, the Supporting Tablets and Handsets document offers even more information about some of these key best practices. And if you’re the type of developer that would prefer to skip the text and jump right into the code, you can even add a Master/Detail flow, complete with handset and tablet support, to your app with just a few clicks using the Android Developer Tools for Eclipse.

Android Design in Action Highlights

Each week, a few of us on the developer relations team get together on the Android Design in Action live show to discuss Android design best practices, as well as provide original ‘redesign’ mockups to help demonstrate our vision of how Android apps should look and feel.

A recent episode focused on the topic of responsive design, or designing flexible apps that can adapt to whatever screen size or form factor they’re run on:

In the episode, we celebrated successful examples of responsive design on Android, ranging from creating calendar events in Google Calendar, to browsing wallpapers and stories in Pattrn and Pocket, to playing video in TED, and finally to managing your conference schedule in the open-source Google I/O 2012 app.

We also regularly feature tablet design concepts on the show (some are shown below), so we highly recommend tuning in each week for design ideas.


For even more tablet app inspiration, check out a few of these apps: Expedia Hotels & Flights, Pulse News, SeriesGuide, Tasks and Timer.

The Tablet Quality Checklist

Over in the “Distribute” section of developer.android.com, the recently published Tablet App Quality checklist is a great way to check if your app is tablet-ready along a variety of technical dimensions. You should make sure that everyone involved in your mobile products is aware of  the standards defined in this checklist, as it is one of the ways in which the Google Play team selects apps to feature in the Staff Picks for Tablets collection.

So What are You Waiting For?

It's been an exciting year for Android tablets. Make sure your app is positioned to succeed in the evolving device landscape by following some of the best practices and examples discussed here and on the rest of developer.android.com.

If you have specific questions about your app, let us know on Google+ (+Android Developers) or Twitter (@AndroidDev)!

Wednesday 14 November 2012

Android SDK Tools, Revision 21

Posted by Xavier Ducrohet, Android SDK Tech Lead, and Angana Ghosh, Product Manager in Android


Along with the Android 4.2 SDK, we also launched a brand new update of the Android SDK Tools (Revision 21). The update includes new tools and capabilities that can help you work more efficiently as you create applications. Tools such as a new multi-config editor, and new Lint rules will help you develop apps more quickly, while a new UI test framework will give you more ways automate testing and QA for your apps. For new developers, one-click SDK download and new app templates help you get started more quickly.


Multi-config editor

A new multi-configuration editor allows you to develop and prototype your UI across various orientations, screen sizes and locales. For example, while editing your layout in portrait mode, you can see if your edits aren't visible in the shorter landscape orientation. You can see previews for other screen sizes from small phones to large tablets, you can see previews for the layout using all the available language translations in your app, and so on. You can even see how the layout appears when it is included as a fragment in a different larger layout. Finally, Android allows you to create specialized layouts for any of these configurations, and the multi configuration editor shows you these overridden layouts.


Here is a screenshot of the layout editor showing one of the layouts from the Google I/O application, across a variety of screen sizes.


More app templates

Tools R21 brings three new app templates to help you to easily add new screens to your app. There’s a new full-screen activity for use as a photo or video viewer, a settings activity to handle basic user preferences and a login activity to capture username/password.


UI Automator Test Framework

One common approach to UI testing is to run tests manually and verify that the app is behaving as expected. UI Automator is a new software testing framework available in Tools R21 that provides you with tools to easily automate UI testing tasks. It provides a GUI tool to scan and analyze the UI components of an Android application (uiautomatorviewer), a library containing APIs to create customized functional UI tests, and an execution engine to automate and run the tests against multiple physical devices. UI Automator runs on Android 4.1 (API level 16) or higher. To learn more head over to the UI Testing documentation.


One-click SDK installer

New Android SDK developers now have a convenient way to download all the various SDK components like Tools, Platform Tools, Eclipse ADT, and the latest system image with a single click. Existing developers can continue to manage their SDK components and get updates through the SDK Manager.


Revamped AVD creation dialog

The new dialog makes it easier to create Android Virtual Devices (AVDs) matching real device profiles. The AVDs will also appear in the layout editor to show you how the layouts will look.


More Lint rules

And to wrap things up there are 25 new lint rules which catch several common sources of bugs, for example deviations from Android design guide for icons, checks for mismanaged wakelocks, common sources of locale-related bugs and so on. So make sure you upgrade and let Lint loose on your projects before your next app update!


A minor bug-fix to the Android NDK is also available. For a complete list of what’s new, see the release notes for SDK Tools R21, ADT 21.0.0 and Android NDK R8c.


Tuesday 13 November 2012

Introducing Android 4.2, A New and Improved Jelly Bean

Posted by Angana Ghosh, Product Manager in Android, and Dirk Dougherty, Android Developer Relations Team


Today we are making Android 4.2 (Jelly Bean) SDK platform available for download. Below are some of the highlights of Android 4.2, API level 17.


Performance

We've worked with our partners to run Renderscript computation directly in the GPU on the Nexus 10, a first for any mobile computation platform.


New ways to engage users

Users can now place interactive lock screen widgets directly on their device lock screens, for instant access to favorite apps and content. With just a small update, you can adapt any app widget to run on the lock screen. Daydream is an interactive screensaver mode that users can encounter when their devices are charging or docked in a desk dock. You can create interactive daydreams that users display in this mode, and they can include any type of content.


New interaction and entertainment experiences

Android 4.2 introduces platform support for external displays that goes beyond mirroring. Your apps can now target unique content to any number of displays attached to an Android device.


Enhancements for international users

To help you create better apps for users in languages such as Arabic, Hebrew, and Persian, Android 4.2 includes native RTL support, including layout mirroring. With native RTL support, you can deliver the same great app experience to all of your users with minimal extra work. Android 4.2 also includes a variety of font and character optimizations for Korean, Japanese, Indic, Thai, Arabic and Hebrew writing systems.


To get started developing and testing, download the Android 4.2 Platform from the Android SDK Manager. For a complete overview of what's new, take a look at the Android 4.2 platform highlights or read more of the details in the API overview.


Thursday 18 October 2012

Google Play Seller Support in India

Posted by Ibrahim Elbouchikhi, Product Manager on the Google Play team


Over the past year, Android device activations in India have jumped more than 400%, bringing millions of new users to Google Play and driving huge increases in app downloads. In the last six months, Android users in India downloaded more apps than in the previous three years combined, and India has rocketed to become the fourth-largest market worldwide for app downloads. To help developers capitalize on this tremendous growth, we are launching Google Play seller support in India.


Starting today, developers in India can sell paid applications, in-app products, and subscriptions in Google Play, with monthly payouts to their local bank accounts. They can take advantage of all of the tools offered by Google Play to monetize their products in the best way for their businesses, and they can target their products to the paid ecosystem of hundreds of millions of users in India and across the world.


If you are an Android developer based in India, you can get started right away by signing in to your Developer Console and setting up a Google Checkout merchant account. If your apps are already published as free, you can monetize them by adding in-app products or subscriptions. For new apps, you can publish the apps as paid, in addition to selling in-app products or subscriptions.


When you’ve prepared your apps and in-app products, you can price them in any available currencies, publish, and then receive payouts and financial data in your local currency. Visit the developer help center for complete details.


Along with seller support, we're also adding buyer’s currency support for India. We encourage developers everywhere to visit your Developer Console as soon as possible to set prices for your products in Indian Rupees and other new currencies (such as Russian Rubles).


Stay tuned for more announcements as we continue to roll out Google Play seller support to many more countries around the world.


Monday 15 October 2012

New Google Play Developer Console Available to Everyone

Posted by Eva-Lotta Lamm, Riccardo Govoni, and Ellie Powers of the Google Play team


We've been working on a new Google Play Developer Console, centered around how you make and publish apps, to create a foundation for the exciting features we have planned for the future. Earlier this year at Google I/O, we demoed the new version (video). Since then, we've been testing it out with tens of thousands of developers, reviewing their feedback and making adjustments.


Today, we’re very happy to announce that all developers can now try the new Google Play Developer Console. At its core, the Developer Console is how you put your app in front of hundreds of millions of Android users around the world, and track how your app is doing. We hope that with a streamlined publishing flow, new language options, and new user ratings statistics, you’ll have better tools for delivering great Android apps that delight users.


Sleeker, faster, easier to navigate


You spend a lot of time in the Developer Console, so we overhauled the interface for you. It's bright and appealing to look at, easy to find your way around using navigation and search, and it loads quickly even if you have a lot of apps.


Designed for speed. Quickly locate the app data and business information you use every day. More screenshots »


Track user ratings over time, and find ways to improve


One of the most important things you'll be able to do is track the success of your app over time — it's how you continue to iterate and make beautiful, successful apps. You'll see new statistics about your user ratings: a graph showing changes over time, for both the all-time average user rating and new user ratings that come in on a certain day. As with other statistics, you'll be able to break down the data by device, country, language, carrier, Android version, and app version. For example, after optimizing your app for tablets, you could track your ratings on popular tablets.


New charts for user ratings. You can now track user ratings over time and across countries. More screenshots »


Better publishing workflow


We've completely revamped and streamlined the app publishing process to give you more time to build great apps. You can start with either an APK or an app name, and you can save before you have all of the information. You can also now see differences between the new and old versions of an app, making it easy to catch unintentional changes before you publish a new version to your users.


More languages for listings, with automated translations


You'll also enjoy a new app publishing flow and the ability to publish your app listing in 49 languages. Once you've saved any change to your application in the new Developer Console, your users will have the option of viewing an automatic translation of your listing on the web today and soon on devices — no additional action on your part is needed.


How can you try the new version?


Go to your Developer Console and click on “Try the new version” in the header or go directly to the new version. If you prefer the new version, don't forget to bookmark the new URL.


Please note that we're not quite done yet, so the following advanced features are not yet supported in the new Google Play Developer Console: multiple APK support, APK Expansion Files and announcements. To use these features, you can click “Switch back” in the header at any time to return to the old version.


Click the “Feedback” link in the header to let us know what you think, so that we can continue to improve your experience as a Google Play developer. Thank you for all of the feedback so far.


Monday 8 October 2012

Building Quality Tablet Apps

Posted by Reto Meier, Android Developer Relations Tech Lead


With the release of Nexus 7 earlier this year, we shared some tips on how you can get your apps ready for a new wave of Android tablets. With the holiday season now approaching, we’re creating even more ways for great tablet apps to be featured in Google Play - including a series of new app collections that highlight great apps specifically for tablet users.


To help you take advantage of the opportunity provided by the growing tablet market, we’ve put together this Tablet App Quality Checklist to make it easier for you to ensure your app meets the expectations of tablet users.


The checklist includes a number of key focus areas for building apps that are a great experience on tablets, including:

  • Optimizing your layouts for larger screens

  • Taking advantage of extra screen area available on tablets

  • Using Icons and other assets that are designed for tablet screens


Each focus area comprises several smaller tasks or best practices. As you move through the checklist, you'll find links to support resources that can help you address the topics raised in each task.


The benefits of building an app that works great on tablets is evident in the experiences of Mint.com, Tiny Co, and Instapaper who reported increased user engagement, better monetization, and more downloads from tablet users. You can find out more about their experience in these developer case studies.


The Tablet Quality Checklist is a great place to get started, but it’s just the beginning. We’ll be sharing more tablet development tips every day this week on +Android Developers. In Android Developers Live, Tuesday’s Android Design in Action broadcast will focus on optimizing user experience for tablets, on Thursday we’ll be interviewing our tablet case studies during Developers Strike Back, and on Friday’s live YouTube broadcasts of The App Clinic and Friday Games Review will be reviewing apps and games on Android tablets.


What are your best tips for building great

tablet apps?


Join the discussion on

+Android Developers


Wednesday 26 September 2012

Google Play services and OAuth Identity Tools

Posted by Tim Bray

The rollout of Google Play services to all Android 2.2+ devices worldwide is now complete, and all of those devices now have new tools for working with OAuth 2.0 tokens. This is an example of the kind of agility in rolling out new platform capabilities that Google Play services provides.

Why OAuth 2.0 Matters

The Internet already has too many usernames and passwords, and they don’t scale. Furthermore, your Android device has a strong notion of who you are. In this situation, the industry consensus is that OAuth 2.0 is a good choice for the job, offering the promise of strong security minus passwords.

Google Play services make OAuth 2.0 authorization available to Android apps that want to access Google APIs, with a good user experience and security.

Typically, when you want your Android app to use a Google account to access something, you have to pick which account on the device to use, then you have to generate an OAuth 2.0 token, then you have to use it in your HTTP-based dialogue with the resource provider.

These tasks are largely automated for you if you’re using a recent release of the Google APIs Client Library for Java; the discussion here applies if you want to access the machinery directly, for example in sending your own HTTP GETs and POSTs to a RESTful interface.

Preparation

Google Play services has just started rolling out, and even after the rollout is complete, will only be available on compatible Android devices running 2.2 or later. This is the vast majority, but there will be devices out there where it’s not available. It is also possible for a user to choose to disable the software.

For these reasons, before you can start making calls, you have to verify that Google Play services is installed. To do this, call isGooglePlayServicesAvailable(). The result codes, and how to deal with them, are documented in the ConnectionResult class.

Choosing an Account

This is not, and has never been, rocket science; there are many examples online that retrieve accounts from Android’s AccountManager and display some sort of pick list. The problem is that they all have their own look and feel, and for something like this, which touches on security, that’s a problem; the user has the right to expect consistency from the system.

Now you can use the handy AccountPicker.newChooseAccountIntent() method to give you an Intent; feed it to startActivityForResult() and you’ll launch a nice standardized user experience that will return you an account (if the user feels like providing one).

Two things to note: When you’re talking to these APIs, they require a Google account (AccountManager can handle multiple flavors), so specify GoogleAuthUtil.GOOGLE_ACCOUNT_TYPE argument as the value for the allowableAccountTypes argument. Second, you don’t need an android.accounts.Account object, you just use the email-address string (available in account.name) that uniquely identifies it.

Getting a Token

There’s really only one method call you need to use, GoogleAuthUtil.getToken(). It takes three arguments: a Context, an email address, and another string argument called scope. Every information resource that is willing to talk OAuth 2.0 needs to publish which scope (or scopes) it uses. For example, to access the Google+ API, the scope is oauth2:https://www.googleapis.com/auth/plus.me. You can provide multiple space-separated scopes in one call and get a token that provides access to all of them. Code like this might be typical:

  private final static String G_PLUS_SCOPE = 
"oauth2:https://www.googleapis.com/auth/plus.me";
private final static String USERINFO_SCOPE =
"https://www.googleapis.com/auth/userinfo.profile";
private final static String SCOPES = G_PLUS_SCOPE + " " + USERINFO_SCOPE;

In an ideal world, getToken() would be synchronous, but three things keep it from being that simple:

  1. The first time an app asks for a token to access some resource, the system will need to interact with the user to make sure they’re OK with that.


  2. Any time you ask for a token, the system may well have a network conversation with the identity back-end services.


  3. The infrastructure that handles these requests may be heavily loaded and not able to get you your token right away. Rather than keeping you waiting, or just failing, it may ask you to go away and come back a little later.


The first consequence is obvious; you absolutely can’t call getToken() on the UI thread, since it’s subject to unpredictable delays.

When you call it, the following things can happen:

  • It returns a token. That means that everything went fine, the back-end thinks the authorization was successful, and you should be able to proceed and use the token.


  • It throws a UserRecoverableAuthException, which means that you need to interact with the user, most likely to ask for their approval on using their account for this purpose. The exception has a getIntent() method, whose return value you can feed to startActivityForResult() to take care of that. Of course, you’ll need to be watching for the OK in the onActivityResult() method.


  • It throws an IOException, which means that the authorization infrastructure is stressed, or there was a (not terribly uncommon on mobile devices) networking error. You shouldn’t give up instantly, because a repeat call might work. On the other hand, if you go back instantly and pester the server again, results are unlikely to be good. So you need to wait a bit; best practice would be the classic exponential-backoff pattern.


  • It throws a GoogleAuthException, which means that authorization just isn’t going to happen, and you need to let your user down politely. This can happen if an invalid scope was requested, or the account for the email address doesn’t actually exist on the device.


Here’s some sample code:

       try {
// if this returns, the OAuth framework thinks the token should be usable
String token = GoogleAuthUtil.getToken(this, mRequest.email(),
mRequest.scope());
response = doGet(token, this);

} catch (UserRecoverableAuthException userAuthEx) {
// This means that the app hasn't been authorized by the user for access
// to the scope, so we're going to have to fire off the (provided) Intent
// to arrange for that. But we only want to do this once. Multiple
// attempts probably mean the user said no.
if (!mSecondTry) {
startActivityForResult(userAuthEx.getIntent(), REQUEST_CODE);
response = null;
} else {
response = new Response(-1, null, "Multiple approval attempts");
}

} catch (IOException ioEx) {
// Something is stressed out; the auth servers are by definition
// high-traffic and you can't count on 100% success. But it would be
// bad to retry instantly, so back off
if (backoff.shouldRetry()) {
backoff.backoff();
response = authenticateAndGo(backoff);
} else {
response =
new Response(-1, null, "No response from authorization server.");
}

} catch (GoogleAuthException fatalAuthEx) {
Log.d(TAG, "Fatal Authorization Exception");
response = new Response(-1, null, "Fatal authorization exception: " +
fatalAuthEx.getLocalizedMessage());
}

This is from a sample library I’ve posted on code.google.com with an AuthorizedActivity class that implements this. We think that some of this authorization behavior is going to be app-specific, so it’s not clear that this exact AuthorizedActivity recipe is going to work for everyone; but it’s Apache2-licensed, so feel free to use any pieces that work for you. It’s set up as a library project, and there’s also a small sample app called G+ Snowflake that uses it to return some statistics about your Google+ posts; the app is in the Google Play Store and its source is online too.

Registering Your App

Most services that do OAuth 2.0 authorization want you to register your app, and Google’s are no exception. You need to visit the Google APIs Console, create a project, pick the APIs you want to access off the Services menu, and then hit the API Access tab to do the registration. It’ll want you to enter your package name; the value of the package attribute of the manifest element in your AndroidManifest.xml.

Also, it’ll want the SHA1 signature of the certificate you used to sign your app. Anyone who’s published apps to Google Play Apps knows about keystores and signing. But before you get there, you’ll be working with your debug-version apps, which are signed with a certificate living in ~/.android/debug.keystore (password: “android”). Fortunately, your computer probably already has a program called “keytool” installed; you can use this to get the signature. For your debug version, a correct incantation is:

keytool -exportcert -alias androiddebugkey -keystore ~/.android/debug.keystore -v -list

This will print out the SHA1 signature in a nicely labeled easy-to-cut-and-paste form.

This may feel a little klunky, but it’s worth it, because some magic is happening. When your app is registered and you generate a token and send it to a service provider, the provider can check with Google, which will confirm that yes, it issued that token, and give the package name of the app it was issued to. Those of you who who’ve done this sort of thing previously will be wondering about Client IDs and API Keys, but with this mechanism you don’t need them.

Using Your Token

Suppose you’ve registered your app and called GoogleAuthUtil.getToken() and received a token. For the purposes of this discussion, let’s suppose that it’s “MissassaugaParnassus42”. Then all you need to do is, when you send off an HTTP request to your service provider, include an HTTP header like so:

Authorization: Bearer MissassaugaParnassus42

Then your HTTP GETs and POSTs should Just Work. You should call GoogleAuthUtil.getToken() to get a token before each set of GETs or POSTs; it’s smart about caching things appropriately, and also about dealing with token expiry and refresh.

Once again, as I said at the top, if you’re happy using the Google APIs Client Library for Java, it’ll take care of all the client-side stuff; you’ll still need to do the developer console app registration.

Otherwise, there’s a little bit of coding investment here, but the payoff is pretty big: Secure, authenticated, authorized, service access with a good user experience.


Join the discussion on

+Android Developers


Thursday 16 August 2012

Creating Your Own Spelling Checker Service

Posted by Satoshi Kataoka and Ken Wakasa of the Android text input engineering team


The Spelling Checker framework improves the text-input experience on Android by helping the user quickly identify and correct spelling errors. When an app uses the spelling checker framework, the user can see a red underline beneath misspelled or unrecognized words so that the user can correct mistakes instantly by choosing a suggestion from a dropdown list.


If you are an input method editor (IME) developer, the Spelling Checker framework gives you a great way to provide an even better experience for your users. You can add your own spelling checker service to your IME to provide consistent spelling error corrections from your own custom dictionary. Your spelling checker can recognize and suggest corrections for the vocabularies that are most important to your users, and if your language is not supported by the built-in spelling checker, you can provide a spelling checker for that language.


The Spelling Checker APIs let you create your own spelling checker service with minimal steps. The framework manages the interaction between your spelling checker service and a text input field. In this post we’ll give you an overview of how to implement a spelling checker service. For details, take a look at the Spelling Checker Framework API Guide.


1. Create a spelling checker service class


To create a spelling checker service, the first step is to create a spelling checker service class that extends android.service.textservice.SpellCheckerService.


For a working example of a spelling checker, you may want to take a look at the SampleSpellCheckerService class in the SpellChecker sample app, available from the Samples download package in the Android SDK.


2. Implement the required methods


Next, in your subclass of SpellCheckerService, implement the methods createSession() and onGetSuggestions(), as shown in the following code snippet:

@Override                                                                        
public Session createSession() {
return new AndroidSpellCheckerSession();
}

private static class AndroidSpellCheckerSession extends Session {
@Override
public SuggestionsInfo onGetSuggestions(TextInfo textInfo, int suggestionsLimit) {
SuggestionsInfo suggestionsInfo;
... // look up suggestions for TextInfo
return suggestionsInfo;
}
}


Note that the input argument textInfo of onGetSuggestions(TextInfo, int) contains a single word. The method returns suggestions for that word as a SuggestionsInfo object. The implementation of this method can access your custom dictionary and any utility classes for extracting and ranking suggestions.


For sentence-level checking, you can also implement onGetSuggestionsMultiple(), which accepts an array of TextInfo.


3. Register the spelling checker service in AndroidManifest.xml


In addition to implementing your subclass, you need to declare the spelling checker service in your manifest file. The declaration specifies the application, the service, and a metadata file that defines the Activity to use for controlling settings. Here’s an example:

<manifest xmlns:android="http://schemas.android.com/apk/res/android"
package="com.example.android.samplespellcheckerservice">
<application android:label="@string/app_name">
<service
android:label="@string/app_name"
android:name=".SampleSpellCheckerService"
android:permission="android.permission.BIND_TEXT_SERVICE">
<intent-filter>
<action
android:name="android.service.textservice.SpellCheckerService" />
</intent-filter>
<meta-data
android:name="android.view.textservice.scs"
android:resource="@xml/spellchecker" />
</service>
</application>
</manifest>


Notice that the service must request the permission android.permission.BIND_TEXT_SERVICE to ensure that only the system binds to the service.


4. Create a metadata XML resource file


Last, create a metadata file for your spelling checker to define the Activity to use for controlling spelling checker settings. The metadata file can also define subtypes for the spelling checker. Place the file in the location specified in the

element of the spelling checker declaration in the manifest file.


In the example below, the metadata file spellchecker.xml specifies the settings Activity as SpellCheckerSettingsActivity and includes subtypes to define the locales that the spelling checker can handle.

<spell-checker xmlns:android="http://schemas.android.com/apk/res/android"
android:label="@string/spellchecker_name"
android:settingsactivity="com.example.SpellCheckerSettingsActivity" />
<subtype
android:label="@string/subtype_generic"
android:subtypeLocale="en" />
</spell-checker>


That’s it! Your spelling checker service is now available to client applications such as your IME.


Bonus points: Add batch processing of multiple sentences


For faster, more accurate spell-checking, Android 4.1 (Jelly Bean) introduces APIs that let clients pass multiple sentences to your spelling checker at once.


To support sentence-level checking for multiple sentences in a single call, just override and implement the method onGetSentenceSuggestionsMultiple(), as shown below.

private static class AndroidSpellCheckerSession extends Session {                 
@Override
public SentenceSuggestionsInfo[] onGetSentenceSuggestionsMultiple(
TextInfo[] textInfo, int suggestionsLimit) {
SentenceSuggestionsInfo[] sentenceSuggestionsInfos;
... // look up suggestions for each TextInfo
return sentenceSuggestionsInfos
}
}


In this case, textInfo is an array of TextInfo, each of which holds a sentence. The method returns lengths and offsets of suggestions for each sentence as a SentenceSuggestionsInfo object.


Documents and samples


If you’d like to learn more about how to use the spelling checker APIs, take a look at these documents and samples:

  • Spelling Checker Framework API Guide — a developer guide covering the Spelling Checker API for clients and services.

  • SampleSpellCheckerService sample app — helps you get started with your spelling checker service.

    • You can find the app at /samples/android-15/SpellChecker/SampleSpellCheckerService in the Samples download.


  • HelloSpellChecker sample app — a basic app that uses a spelling checker.

    • You can find the app at /samples/android-15/SpellChecker/HelloSpellChecker in the Samples download.


To learn how to download sample apps for the Android SDK, see Samples.


Join the discussion on

+Android Developers


Followers